Saturday, December 31, 2016

Escarole & polenta pie


It may not look like much but few foods are more comforting to me than this one. I've been eating polenta with escarole since I was a boy and no matter how many times I make it, it always tastes the same. Even when it isn't.

You know how that is.

Anyway, it's New Year's Eve and we've all got lots to do. I'll get right to it then.


As with so many good things, start out by sauteing lots of garlic, anchovy and a little hot pepper in plenty of good olive oil.


After a couple minutes toss in your escarole and cover so that it steams a bit. This is 3 bunches of escarole here, which have been cleaned and chopped.


Making polenta is an inexact science and so go with the way you're most comfortable. In terms of quantities for this dish, I used 1 1/3 cups of polenta and cooked it in around 7 cups of water.


Once the escarole has softened remove the lid, add some chopped kalamata olives and pine nuts, and saute another couple minutes. Salt and pepper to taste. (I've also had this with raisins instead of olives, which is more Sicilian style, and it's great too. And it works without the pine nuts too.)


Assembling is a piece of cake. Just put down a layer of the polenta in a baking dish that's been lightly coated with olive oil, so that the bottom of the pan is completely covered.


Then add the escarole, but make sure not to use very much of the liquid that's left in the pan it sauteed in. I just scoop out the escarole with a slotted spoon.


All that's left to do now is put down another layer of polenta, at which point cover the pan with aluminum foil and place in an oven preheated to 375 degrees F. After 30 minutes remove the foil and bake for another 15 minutes or so. The edges of the polenta should start to brown slightly. Think of it as if it's lasagne; that'll help figure out when it's done.


This was in the oven close to an hour. It's best not to cut into it immediately; let it rest at least a few minutes or more and then have at it.


I really do love this stuff.

Happy New Year everybody!

Saturday, December 17, 2016

Almond cookies


If these specimens remind you of traditional pignoli (pine nut) cookies, there's a good reason: They are exactly the same cookies, just with almond slices outside instead of pine nuts.

There's also a reason that I bothered to do this, though how good a reason I'm not entirely certain. See, I get a lot of emails around the holidays asking about my pignoli cookie recipe. Some ask why I use a little flour (I think it improves the texture and makes the cookies easier to make); others bemoan the fact that they can't find almond paste in their part of the world. 

This year I've been approached by several people who've complained that pine nuts mess with their taste buds. The specific charge is that some pignolis leave a bitter or even metallic taste in their mouths. And not just for a few moments, but possibly as long as days. 

I poked around some and, sure enough, found that there is something called "pine nut syndrome." It's a mystery what this is exactly. But it's a real thing. Even the Food and Drug Administration is onto it, noting that for certain people eating pine nuts "decreases appetite and enjoyment of food."

We cannot have any of that around here, of course. Certainly not around the holidays. And so allow me to present a new holiday tradtion to the pine nut-afflicted among us: The pignoli-less pignoli cookies, made not with pine nuts but with almonds instead.

Hey, we're all about inclusion here.


First of all, the only kind of almond paste you can use is the kind that comes out of a can like this. I get a lot of emails asking if it's okay to use the paste that comes out of a tube or a box. It isn't okay. I realize that some people have trouble finding canned paste where they live, but it's what you need if you want to make these cookies.


Break up the paste and put it in a food processor with 1/4 cup sugar, 1/2 cup confectioners sugar, and 3 tablespoons of all-purpose flour (the complete ingredient list is below). Process until fine.


Here's what it'll look like, and getting to this point won't take very long at all, less than a minute I'd say. At this point add one egg white and process until a dough forms,


Again, this won't take long at all.


Here's the completed dough. It's not a lot, fits in the plam of my hand.


Empty 6 to 8 ounces of sliced raw almonds into a plate or bowl (or any work surface you prefer). Sliced almonds come in different forms; use whatever type you like.


Have a bowl of water on hand. Dip your fingers in the water, take a small piece of dough, then roll it in the almonds until completely covered. Don't bother being delicate with the dough, just work things until the almonds adhere.


Like so.


Line the cookies on a parchment-lined baking sheet and place in the oven preheated to 300 degrees F. After 10 minutes rotate the sheet. After another 10 minutes check to see if the cookies have gotten golden brown. If they haven't rotate the tray again in 5-minute intervals until the cookies are done, at which point place them on a rack to cool.


This batch wound up taking just under 30 minutes, and they tasted totally swell.

The pignoli-less pignoli cookie tradition might actually have some legs.


Almond Cookies
Recipe
Makes around sixteen cookies

1 8-oz can almond paste (do NOT use the tubes; the texture is different)
1/4 cup sugar
1/2 cup confectioners sugar
3 tablespoons all-purpose flour
1 extra large egg white
6-8 oz raw sliced almonds

Preheat oven to 300 degrees F
In a food processor, crumble the almond paste, then add the sugars and flour and mix until fine
Add the egg white and mix until dough forms
Empty the almonds into a plate or bowl
Scoop out small amounts of the dough (wet hands help and so I keep a bowl filled with water on hand), then roll in the almonds until coated
Place on a baking sheet lined with parchment paper and bake for 10 minutes
Rotate the sheet and bake another 10 minutes. If cookies are not golden rotate pan in 5-minute intervals until they are
Allow to cool on a rack, give a light dusting of confectioners sugar, and serve

Wednesday, December 14, 2016

Ragu alla Bolognese


Pay attention because this is important: It only looks like a pasta course you have seen me prepare here a couple hundred times before.

But it isn't. Until a few weeks ago I didn't even know such a thing as this existed. I swear.

What you have here is the official, government-sanctioned recipe for Ragu alla Bolognese, commonly referred to as Bolognese Sauce. The recipe was "notarized and deposited" in the Chamber of Commerce of the City of Bologna on October 17th, 1982, by "solemn decree" of the Accademia Italiana della Cucina (the Italian Academy of Cuisine).  

Who knew?

Turns out, not many. My friend Biancamaria is from Bologna and she never heard of any "official" Ragu alla Bolognese recipe. Which is saying something because, as she tells me, "when I was a child every Sunday we had ragu." 

I didn't catch up with Bianca on a recent visit to Bologna (she's living in the English countryside now with Massimo and their daughter Delfina) but on at least four occasions I got to sample authentic Ragu alla Bolognese. And it's nothing like many of the so-called Bolognese sauces you'll come across elsewhere. 

For starters, a lot of "Bolognese" sauces are basically tomato sauces that have meat in them. A real Bolognese is a meat sauce that has only a touch of tomato. The earliest examples of Ragu alla Bolognese didn't include any tomato at all. And forget about using pasta shapes like spaghetti; nobody in Bologna would even think of pairing their ancient ragu with anything but a flat, fresh pasta such as tagliatelle. Just ask for tagliatelle at a restaurant in Bologna and watch what you get. Same thing if you ask only for ragu.

Anyway, and as you no doubt have surmised, I just had to give the "notorized" recipe a shot. I've reprinted it in its entirety below, but here is the link as well. Just a note about the ingredients: My quantities are not exactly those shown in the recipe. I have, however, made the necessary adjustments to follow the recipe as closely as possible.


Start out by finely chopping equal amounts of onion, carrot and celery. Here we've got just under 3 ounces of each.


Finely dice around 1/2 lb. of pancetta and then brown in a Dutch oven that's large enough to accommodate all the recipe's ingredients.


Add the onion, carrot and celery to the browned pancetta and saute until the vegetables are nicely softened.


Okay, about the meat. The recipe calls for ground skirt steak, but skirt wasn't available and so I went with tender hanger steak instead. Rather than grind the meat I decided to very finely dice it, as I have seen both approaches taken. This is one pound of beef.


Once the vegetables have softened add the beef and allow it to brown.


Then add 1/2 cup of wine (I went with white but red is also approved) and, here's the tricky part, a small amount of tomato. The recipe calls for either tomato sauce or highly concentrated tomato paste. I made a small quantity of very simple tomato sauce and added around a cup here. I also added a little homemade beef stock, as this is also mentioned in the recipe.


At this point things are supposed to simmer for two hours, at a low flame. But don't expect to make yourself scarce for these couple hours. Because little by little you'll need to stir in very small amounts of whole milk, at fairly regular intervals, until you've gone through one full cup.


Speaking of milk, an "optional but advisable" addition to the sanctioned recipe is panna di cottura. Basically that means whole milk that has been slowly simmered to half its original volume. That's around 1 1/3 quarts of milk you see in the pot there. While the sauce was slowly simmering so was the milk, until it was halved. 


After two hours of simmering (and only a slight addition of salt and pepper to taste) this is what the ragu looked like. But we aren't finished yet.


The next step is to slowly stir in the panna di cottura (the reduced whole milk). Since this step was "advisable" I decided to throw caution to the wind and use up all the milk.


I know, this looks awfully cream sauce-like, doesn't it. I was nervous too.


But it turns out I didn't need to be. This was a damned fine ragu that I'll be working on until it tastes like I'm back in Bologna. 

If that doesn't work, there's always Alitalia.

The Official Ragu alla Bolognese
Reprinted from Accademia Italiana della Cucina. 

Ingredients

300 gr. beef cartella (thin skirt)
150 gr. pancetta, dried
50 gr. carrot
50 gr. celery stalk
50 gr. onion
5 spoons tomato sauce or 20 gr. triple tomato extract
1 cup whole milk
Half cup white or red wine, dry and not frizzante
Salt and pepper, to taste.


Procedure

The pancetta, cut into little cubes and chopped with a mezzaluna chopping knife, is melted in a saucepan; the vegetables, once again well chopped with the mezzaluna, are then added and everything is left to stew softly. Next the ground beef is added and is left on the stovetop, while being stirred constantly, until it sputters. The wine and the tomato cut with a little broth are added and everything left to simmer for around two hours, adding little by little the milk and adjusting the salt and black pepper. Optional but advisable is the addition of the panna di cottura of a litre of whole milk at the end of the cooking.


Wednesday, December 7, 2016

Chocolate almond cookies


I'm not going to lie to you. I screwed up with these cookies. Just ask my friend Joe, he'll tell you. For days he'd helped me to unravel the mystery of, well, let me just show you.
This solid brass die fits onto an extruder known as a torchietto, one of several fine pasta-making tools gifted to me on a recent trip to Italy. As it turns out, this particular die, which I purchased separately and without first investigating, is not designed for making pasta at all. 

I discovered this the hard way, of course—after preparing a batch of my tried and true fresh pasta dough and then running it through the torchietto. I mean, just look at those giant things, would you! Pasta this ain't.

Turns out the die is for making this Piedmontese biscotti (photo not mine) known as Quaquare di Genola. Neither Joe nor I were familiar with the exact term; we just knew that we liked the cookies. And so the next day I brought out both the torchietto and the die again and set out to make a chocolate-and-almond version of the Quaquare di Genola.

Which brings us back to me being such a screwup—one who probably ought to stick to pasta-making, not baking. The cookie dough came out of the torchietto looking a little like the Piedmontese biscotti but in no way would the forms hold together well enough to get onto a baking sheet.

Which is too bad. Because once I ditched the torchietto the cookies turned out to be really excellent—totally worth giving a try, I think.

Though considering my now well-documented deficiencies as a baker I wouldn't blame you for looking the other way.

Chocolate almond cookies
Makes 70 cookies

2 1/2 cups all-purpose flour
1 cup high-quality Dutch cocoa powder
1/4 teaspoon salt
2 1/2 teaspoons baking powder
2 sticks plus 1 tablespoon unsalted butter
3/4 cups sugar
Zest of 2 oranges
1 egg
1 egg yolk
1 tablespoon orange liqueur
1/2 cup almonds, run through a food processor until fine but not powdery

Mix the flour, cocoa, salt and baking soda in a bowl.
In an electric mixer blend together the butter, sugar and orange zest until fluffy. 
Add the egg, egg yolk, orange liqueur and almonds and mix thoroughly.
Wrap the dough in plastic and refrigerate for an hour.

On a floured work surface divide the dough in four and roll out each piece into a log around 1 1/2-inch around. One at a time slice each roll into pieces that are around 1/4-inch thick, then lay the pieces out on baking sheets covered in parchment paper.
Bake for around 9 or 10 minutes in a 350 degree F oven.


Sunday, November 13, 2016

Pumpkin ricotta pie


There's a reason nobody ever asks me to cook Thanksgiving dinner: I'm not wired for it. And can't be trusted to do things the traditional way.

Let's face it, my idea of a Thanksgiving feast isn't so much about the bird and the stuffing and the side dishes as it is about starting things off with my mother's manicotti (and possibly ending them with cousin Josephine's biscotti). Not exactly what most folks expect when they gather to celebrate such a uniquely American holiday, and so I don't blame people for keeping me away from the kitchen year after year.

Last Thanksgiving I did manage to snooker my way into the dessert portion of the festivities, by promising to bake a simple and completely traditional pumpkin pie.

"You're not gonna screw around with it, right?" asked My Associate, understandably dubious of my intentions. "We're talking about a straight-up, old-fashioned pumpkin pie. That's what you're offering to make, nothing else?"

Anticipating the woman's resistance I had come prepared with unimpeachable evidence to prove that my motives were pure.

"Is this traditional enough for you?" said I confidently, holding in my hand an original edition of Joy of Cooking. "It'll be by the book, I swear."

Once given the go ahead I had every intention to follow Joy of Cooking's recipe to the letter, and in fact did so in every way but one: At the last minute—while no one was watching—I decided to, well, not exactly bake a straight-up old-fashioned pumpkin pie for Thanksgiving.

There was some very nice fresh ricotta in the fridge, you see. It was only a small amount, leftover from the batch of mom's manicotti that I had prepared and stored away earlier in the day.

"Why not?" I muttered, looking around to see that I was indeed alone. "Nobody will even notice."


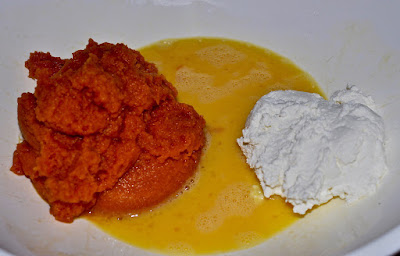
The full list of ingredients is below but basically the deal is this: Instead of using the 2 cups of pumpkin that the recipe called for, I went with 1 1/2 cups pumpkin and that 1/2 cup ricotta in the fridge. They're about to be spoon-mixed with the two eggs that are in the recipe.


Then the white and brown sugar and spices are mixed in.


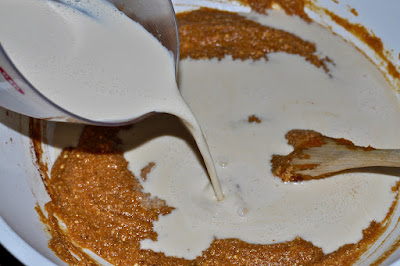
Along with evaporated milk.


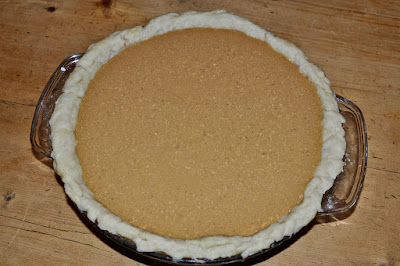
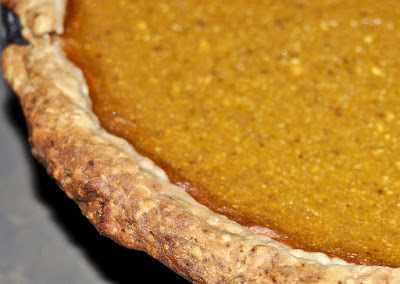
The pie crust is one that I swear by. It's from Cook's Illustrated and the complete recipe is below. Pour the mixture into your pie shell and bake for 15 minutes at 425 degrees F, then reduce the heat to 350 and bake for another 45 minutes, or until an inserted knife comes out clean.


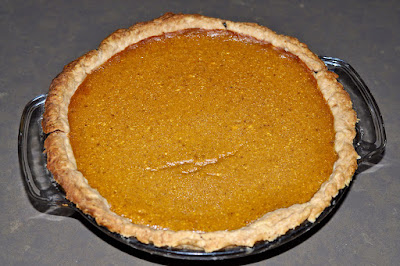
And there you have it, a not entirely traditional pumpkin (and ricotta) pie that'll go along just swell with your Thanksgiving feast.


One other thing. People did notice. Who knows, they may even request the pie again this year.

Of course, I can't promise not to mess with the recipe all over again.

Happy Thanksgiving everybody!

For the pie crust
From Cook's Illustrated
NOTE: This recipe is for a double crust but only the bottom crust is needed here.

Ingredients
2 1/2 cups unbleached all-purpose flour
1 teaspoon table salt
2 tablespoons sugar
12 tablespoons (1 1/2 sticks) cold unsalted butter, cut into 1/4-inch slices
1/2 cup cold vegetable shortening, cut into 4 pieces
1/4 cup cold vodka
1/4 cup cold water

Directions
Process 1 1/2 cups flour, salt, and sugar in food processor until combined, about 2 one-second pulses.

Add butter and shortening and process until homogeneous dough just starts to collect in uneven clumps, about 15 seconds (dough will resemble cottage cheese curds and there should be no uncoated flour).

Scrape bowl with rubber spatula and redistribute dough evenly around processor blade. Add remaining cup flour and pulse until mixture is evenly distributed around bowl and mass of dough has been broken up, 4 to 6 quick pulses. Empty mixture into medium bowl.

Sprinkle vodka and water over mixture. With rubber spatula, use folding motion to mix, pressing down on dough until dough is slightly tacky and sticks together.

Divide dough into two even balls and flatten each into 4-inch disk. Wrap each in plastic wrap and refrigerate at least 45 minutes or up to 2 days.

For the filling
Adapted from the original Joy of Cooking

1 1/2 cups cooked pumpkin 
1/2 cup ricotta (This is the only alteration I have made. Should you be looking for Joy's recipe simply ditch the ricotta and go with 2 cups of pumpkin.)
1 1/2 cup evaporated milk
1/4 cup brown sugar
1/4 cup white sugar
1/2 teaspoon salt
1 teaspoon cinnamon
1/2 teaspoon ginger
1/4 teaspoon nutmeg or allspice
1/8 teaspoon cloves
2 slightly beaten eggs

Saturday, October 29, 2016

The gift of love (and pasta)


I can be pretty obsessive about fine hand tools. Once, when thumbing through Andrew Carmellini's book Urban Italian, I noticed the most beautiful pasta-cutting tools I'd ever seen. They were made of solid brass and hardwood and I knew right away that I had to own them. But the tools were nowhere to be found at the time. Believe me, I looked. Everywhere.

And so I did the only thing left that I could think of.

"Are those pasta-cutters in the book yours?" I asked Carmellini after tracking him down in New York. "And if they are, where did you get them?"

For a hotshot big city chef the man was kind and more than accommodating. Unfortunately, he couldn't say where he had purchased the tools.

"I was in Italy, traveling around the Emilia-Romagna," Carmellini explained. "That's when I picked up the cutters. I just don't remember where. Sorry."

That was eight years ago. Earlier this month I found the tools in Bologna, the capital of Italy's Emilia-Romagna region, at a 233-year-old shop called Antica Aguzzeria Del Cavallo. The pasta cutters you see above are mine now, not Carmellini's. They were a gift from My Associate and traveling companion, a woman whose generosity humbles me like nothing else I can conjure.


And she didn't stop there. Resting on the same shelf as the pasta cutters was this solid brass torchietto, a press (or extruder) for making things like spaghetti, passatelli, bucatini and other shapes that require extrusion. (In the U.S. you can find this at Fante's Kitchen Shop.)


And there's more. Leaving the store we spotted this in the display window outside. It's a solid brass cutter for making medium-size noodles like fettuccine and, in all honesty, its beauty stopped both of us in our tracks.

"We're not leaving here without that," said the woman, removing her arm from mine and turning back into the ancient shop for another round of gift giving. "And don't you dare try and convince me that you don't want it."

I'm lucky that way. In the next few weeks I'll try and live up to this extraordinary generosity by putting these fine gifts to good use.

Stand by.

Tuesday, September 27, 2016

Roasted sauce with short ribs


I've been cooking fresh tomato sauce for weeks now and so there's plenty in the freezer to last me (and the usual suspects; you know who you are) through the year. Recipe? Fuhgeddaboudit. I wing it every time, which means that every batch of sauce, 10 or so in all this summer, has been different. The last couple batches have been especially tasty and feature whole bone-in meats, like the pork butt from a couple weeks back and now these beef short ribs.


This sauce uses up the last of my garden's tomatoes, even a few that didn't ripen. I won't bore you with the details of using green tomatoes, or the roasting process in general, as we've covered the topics before. For the background here's the Roasted Green Tomato Sauce recipe and here's another Roasted Tomato Sauce that combines both ripe and green specimens. These chopped-up garden tomatoes filled my largest metal bowl. I'm guessing it's around 8 or 10 pounds' worth of tomatoes.


Again, winging it is highly encouraged around here. To start a sauce don't be afraid to be creative. I've used huge leeks, hunks of diced-up prosciutto ends or pancetta, a piece of speck I'd been neglecting in the fridge, all kinds of things. But four items you gotta have, in whatever amount you like, are carrots, celery, onion and garlic.


This is 2 pounds of beef short ribs (bone-in). Generously coat all sides with kosher salt and freshly ground pepper. (As I mentioned earlier, a whole pork butt would get the exact same treatment throughout this process should you decide to go that route instead.)


Pour plenty of olive oil into whatever oven-ready pot you'll be cooking the sauce in (mine is a 13-quart dutch oven), brown the ribs and then remove and set aside.


Add the carrots, celery, onion and garlic, along with whatever fresh herbs you like, and saute until they've softened. NOTE: You'll also see that there are several anchovy fillets in here. I always use them because they add a depth to the flavor; plus, I don't need to add as much salt. And no, you can't taste the anchovy in the sauce. Use it, don't use it, makes no difference to me.


Add half a cup to a cup of red or white wine (I often use a dry vermouth) and allow it to reduce.


Then return the ribs to the pot.


Add your tomatoes, mix everything up, cover and put in the oven preheated to 350 degress F.


When the meat is very tender (2 hours ought to do it but poke at the meat with a fork to be sure) remove the ribs and set aside to cool. Raise the oven temperature to 450 degreees F and return the pot to the oven for another 30 minutes or so, or until the sauce's consistency is to your liking. If the sauce is already the consistency you like then don't bother cooking it any longer.


After the ribs have cooled enough to handle, shred off all the meat.


All that's left to do now is add the meat to the sauce and mix thoroughly.


Oh, and boil yourslf some pasta to go with it.

But I'm pretty sure you knew that already.